To create a new partner account with connection type OFTP2 please proceed as follows:
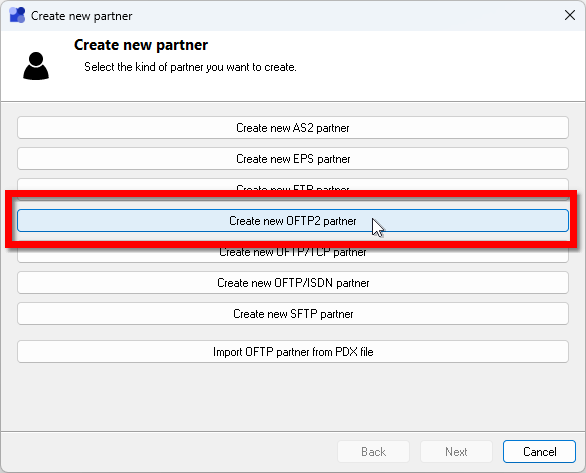
1 In the navigation tree select the Partners entry and then click the button Add new partner.
2 Click on the button Create new OFTP2 partner.
3 Follow the instructions of the wizard: Give the partner a name and enter the IP address or host name via which Odette client of your partner can be reached. Ifyour partner does not have a fixed IP address or URL, e.g. if he is assigned a new IP address each time he connects to the Internet, select the option No active connections allowed. In this case, a connection must always be established by your partner, he must "fetch" his files himself, so to speak. In this case, you yourself need a fixed IP address or URL. After your selection, continue the wizard to the end. The procedure of the wizard corresponds to the creation of an OFTP/TCP partner.
4 After completing the wizard, select the newly created partner in the partner management, click theEdit button (or double-click the partner's entry) and open the Security page in the settings .
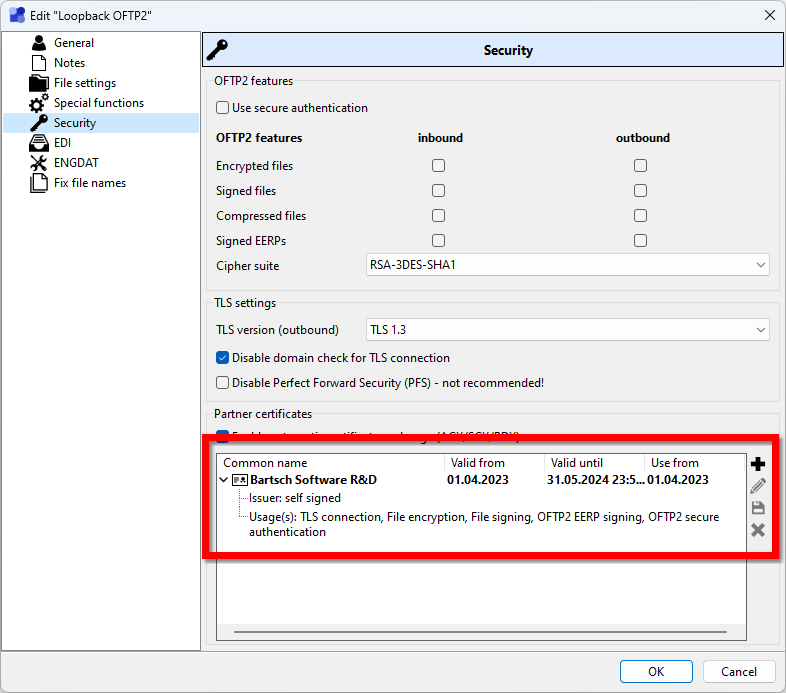
5 Now add the corresponding certificates for the partner via the Add certificate button. A certificate must be stored for a partner so that outgoing connections to this partner are accepted and for incoming connections if the option Require certificate from clients is activated. There are several options for adding a certificate. You can import the public certificate of your partner from a file, select it from the Windows certificate store Trusted People if it is already stored there. Additionally !MC5 can try to get the certificate of the partner by trying to establish a direct connection to it. With this attempt, the remote peer transmits its certificate, which can then be stored for this partner. With this method, check very carefully whether the received certificate is trustworthy before accepting it!
6 Select the associated purposes for each certificate. In most cases, only one certificate is used for all purposes. However, depending on the partner, it may also be the case that several certificates are used for different purposes.
7 Accept the changed settings by clicking OK. You can now exchange data with the new partner via OFTP2.