If Client Only or Client (send only) and Server (receive only) is selected as the mode for a partner, then the settings required for connecting to the partner's FTP/S server and for file upload and download can be adjusted on the Client page. You should have received access data and information on the settings to be made from your partner in advance.
1 Now switch to the client and first enter the host name or IP address of the FTP server you want to connect to. If a port different from the value 21 is used (21 is the default port for FTP), then adjust the value under Port accordingly.
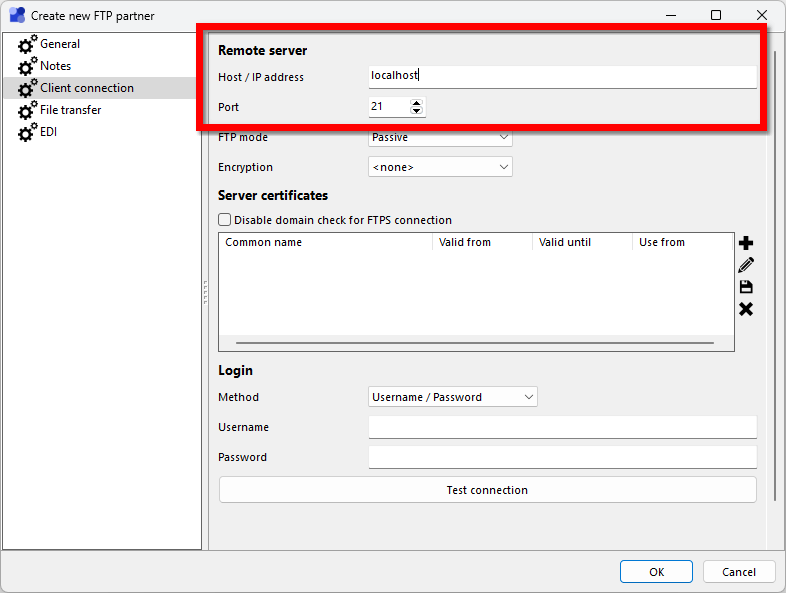
2 Now select the desired mode under FTP mode. The mode affects how additional connections are established for data transfer. You can choose between Active and Passive. In Active mode, the client (i.e. !MC5) opens a port on your system to which the server actively connects and then sends data. This only works if incoming connections from the server to the system !MC5 is running on are possible. In Passive mode, the connection for data transmission is established in reverse: the client "asks" the server for a connection to transmit data. The server then opens a port for this purpose and informs the client about it. The client then establishes a connection to this port. Appropriate firewall settings may also have to be made for this.

3 If you want to use encrypted connections for your FTP transfers, now select the desired encryption method. In most cases Explicit TLS is used. Then add a suitable certificate. If necessary, enable the Disable domain checking for FTPS connection option. It is advisable to use encryption whenever the security of the transmission is not guaranteed, such as with Internet connections.

4 Enter your username and password for logging in to the partner's FTP server in the corresponding fields. Currently, the only login method available is user name and password.

5 You can now test (again) if connection and login to the FTP server work byclickingtheTest connection button. This also checks whether data transfer from the server is possible. If everything works, you can continue with the settings for uploading and downloading files.
6 If files are to be downloaded via the client connection, then first check the Enable downloading box. Otherwise, skip to step 10.
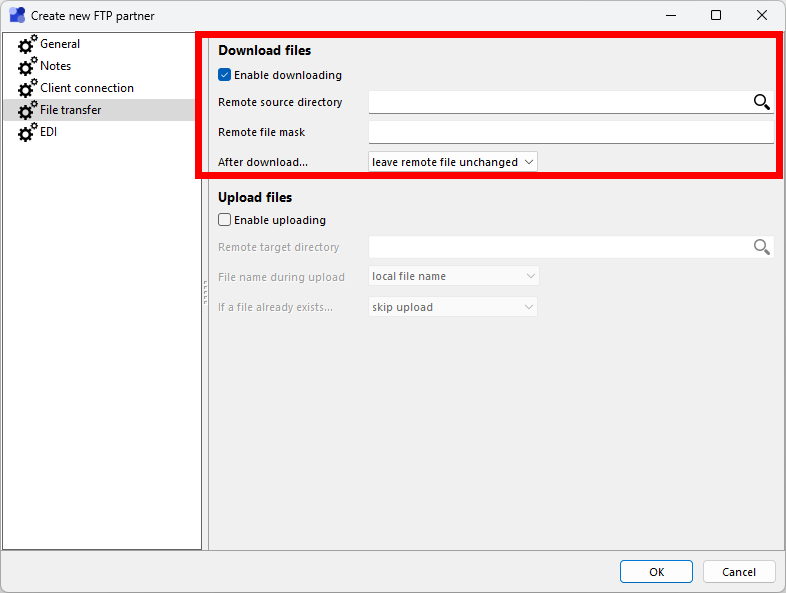
7 In the Remote source directory field, specify the directory on the FTP server where you want to search for new files. This should have been communicated to you by your partner. You can either enter the directory directly or select it via the magnifying glass icon in the input field. The prerequisite for this is that the connection to and log on to the FTP server are working. If !MC5 is used as a server, the source directory cannot be changed for security reasons. !MC5 always uses the source directory created for this partner.
8 In the Remote file mask field, enter a file mask to be used to search for files to download in the search directory. With * all files from the directory will be downloaded.
9 Next, specify what to do with successfully downloaded files on the server. Either nothing can be done with it, the file can be deleted or it can be moved to another directory on the server. What to choose here is to be agreed with the partner. For example, it may be necessary to delete successfully downloaded files from the server so that they are not downloaded again on each subsequent connection. A "normal" FTP server does not react to the fact that a file has been downloaded by a user and leaves it unchanged in the corresponding directory. So on the next connection the file would be found and downloaded again. If !MC5 is used as a server, this option is ignored. Downloaded files are automatically copied to the backup folder of the partner outbox directory.
10 If files are to be uploaded to the server via the client connection, then check the Enable uploading option .

11 In the Remote target directory field, specify the directory on the server to which the files are to be uploaded. Alternatively, you can click on the magnifying glass icon in the input field for the target directory to search for the corresponding directory directly on the server. The prerequisite for this is that the connection to and log on to the FTP server are working.
12 Normally, files are uploaded to the server with the file name they have locally. If your partner has the default that files have a different name during upload and should only be renamed to the "correct" name after successful upload, then select the option custom under File name during upload and specify the name to be used during upload. A * in the name will be replaced by the original name. For example, if you specify *.temp as the file name for the upload and send the file test.edi to the partner, it will be uploaded with the name test.edi.temp and renamed to test.edi after successful upload on the server. If !MC5 is used as the FTP server, this option should not be used. !MC5 automatically makes the file available after a successful upload.
13 If a file with the same name of a file to be uploaded already exists in the target directory, the corresponding upload will be skipped. Under If a file exists... you can change this behavior by selectingthe Overwrite existing file option. When using !MC5 as a server, this option has no effect. In this case, a sequential number is appended to the name of the new file to distinguish it.
14 If processing of received data or data to be sent is to be done via the EDI module, adjust the settings under EDI accordingly (see Data processing / EDI / Set up partner).
15 Save the settings by clicking OK.
16 The partner is now set up and ready to use.
