Click New Job in order to generate a new sending job. First select the partner that shall receive the files. On the following page you can upload the files to the server. The files are stored in a temporary folder. They will only be moved to the out-folder of !MC5 when the job creation is finished successfully. As long as the job creation is not finished the files can be removed from the temporary folder again.
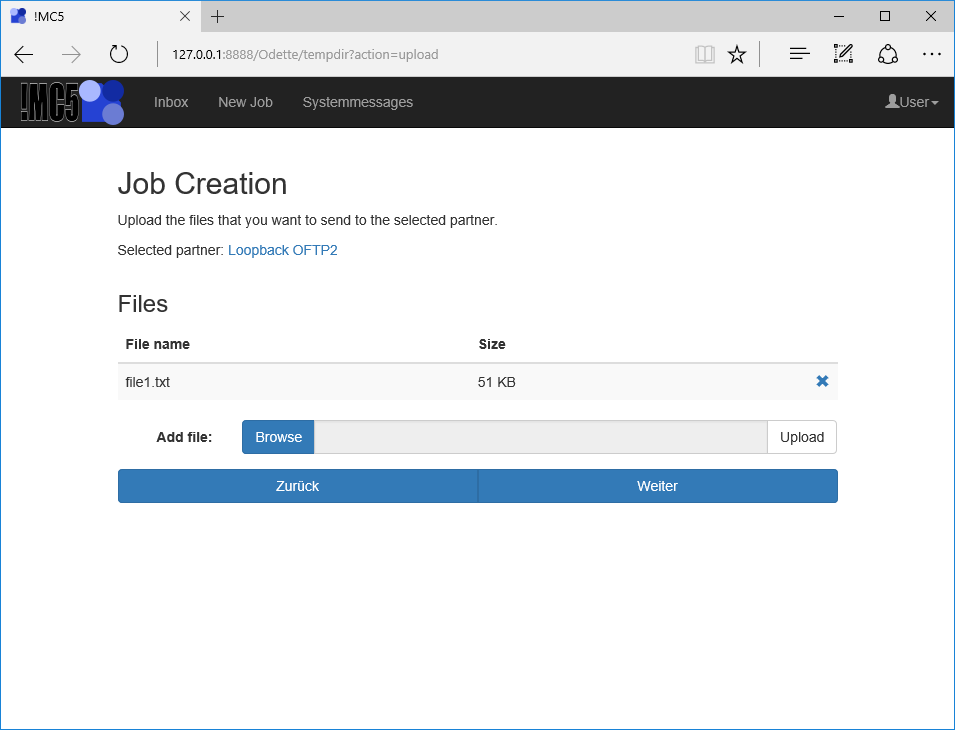
New job file upload.
The job will be generated by clicking Next. Is ENGDAT or EngPart active for this partner extra pages for ENGDAT / EngPart will follow instead. After a job was generated successfully it can only be edited or deleted in !MC5 directly.
ENGDAT/EngPart partner
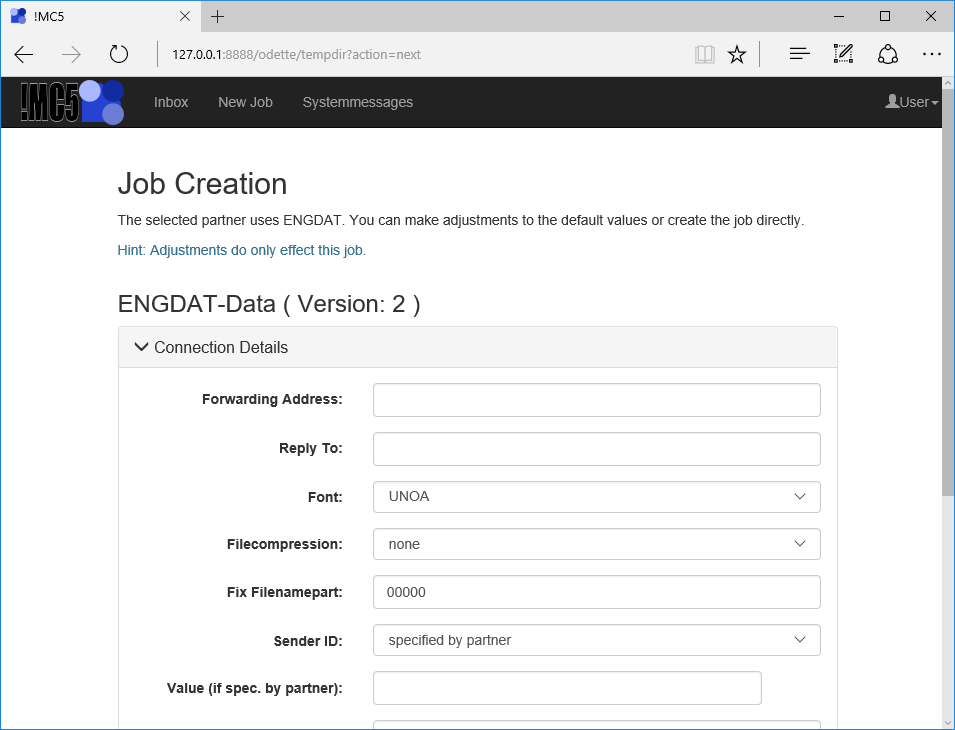
Editing of ENGDAT data using the HTTP Client.
The plus symbol opens a section and various input fields become visible. The ENGDAT page will always be pre-filled with the settings done in the address database of !MC5. By clicking Create Job the server will first generate valid ENGDAT and then start the sending job.